TL;DR:
- Making homemade soap offers control over natural ingredients, avoiding harmful synthetics.
- The cold process method involves careful measuring, blending, and curing for 4 to 6 weeks.
- Personalization with natural colors, scents, and superfatting enhances skin softness and gift appeal.
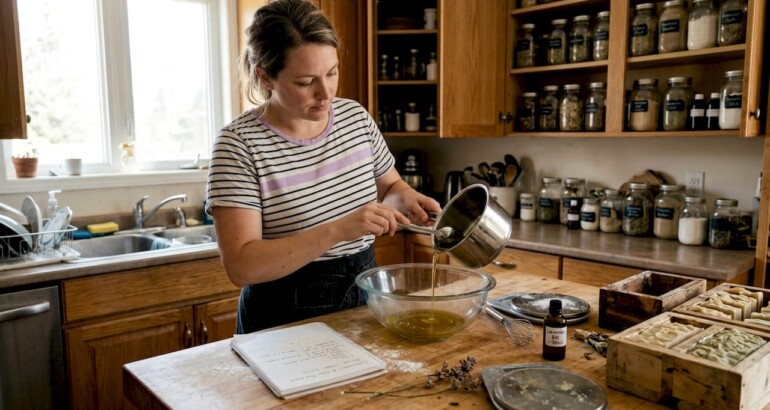
Store-bought soap often contains synthetic detergents, artificial fragrances, and preservatives you can barely pronounce. If you’ve ever flipped a bar over and felt unsure about what’s actually touching your skin, you’re not alone. Making your own soap puts you in complete control of every ingredient, from the oils you choose to the botanicals you add. It’s a deeply satisfying craft that rewards patience and precision. This guide walks you through everything: the tools you need, how to stay safe with lye, the cold process method step by step, how to personalise your bars, and how to troubleshoot problems so your soap is gift-ready and skin-safe.
Table of Contents
- Gathering your tools, ingredients, and safety essentials
- Cold process soap making: step-by-step instructions
- Personalising your soap: scents, colours, and superfatting
- Troubleshooting and finishing: curing, storage, and common mistakes
- What most DIY soap guides overlook
- Take your natural skincare further with ZenChemy Lab
- Frequently asked questions
Key Takeaways
| Point | Details |
|---|---|
| Start simple and safe | Use a basic recipe and essential safety gear for your first batch. |
| Cold process preferred | The cold process method offers true handmade quality and customisation. |
| Don’t skip the cure | Curing for 4–6 weeks is essential for a gentle, long-lasting soap bar. |
| Superfat for mildness | Extra oils left in the soap make it gentle and luxurious on your skin. |
| Troubleshooting is normal | Almost every beginner faces small hiccups—learn and try again for perfect bars. |
Gathering your tools, ingredients, and safety essentials
Before mixing ingredients, ensure you’ve set up correctly and safely. The right equipment makes all the difference between a confident first batch and a frustrating one.
Essential equipment checklist ✅
- Digital kitchen scale (accuracy to 1g)
- Stainless steel or heat-proof glass thermometer
- Heat-proof containers (stainless steel or glass, never aluminium)
- Silicone soap moulds or a lined wooden mould
- Stick blender
- Silicone or stainless steel spatulas
- Safety goggles, nitrile gloves, and long sleeves
- White vinegar (for neutralising lye spills)
- Dedicated soap-making bowls (never reuse for food)
Best starter oils for beginners 🌿
| Oil | Benefit | Typical usage rate |
|---|---|---|
| Olive oil | Moisturising, gentle | 40-70% |
| Coconut oil | Hardness, lather | 20-30% |
| Shea butter | Creamy, skin-nourishing | 5-15% |
A digital scale is non-negotiable. Soap making is chemistry, and even small measurement errors can affect saponification, the reaction between lye and oils that creates real soap. Guessing with cups and spoons simply doesn’t work here. If you’re exploring natural soap types to decide on your first recipe, starting with a simple olive and coconut oil blend is a well-proven approach.
For prepping for soap making, a well-ventilated workspace is essential. Lye fumes are brief but sharp when first mixed, so open a window or work outdoors.
⚠️ Safety note: Wear goggles, nitrile gloves, long sleeves; work in a ventilated area; always add lye to water slowly (never the reverse); use heat-safe glass or stainless steel; avoid aluminium entirely; keep vinegar nearby for neutralisation.
Pro Tip: Start with a small 500g oil batch. It’s easier to manage, wastes less if something goes wrong, and builds your confidence quickly before you scale up.
Cold process soap making: step-by-step instructions
Once you’ve assembled your tools and ingredients, let’s walk through the key process. Cold process is the most popular DIY method because it preserves the natural goodness of your oils and gives you full creative control.
Step-by-step cold process method:
- Weigh all oils using your digital scale and melt any solid oils (coconut, shea) gently on low heat.
- Prepare your lye solution by slowly adding lye to distilled water (never water to lye). Stir carefully. The solution will heat up dramatically.
- Allow both mixtures to cool to between 90 and 110°F (32 to 43°C). Use your thermometer.
- Slowly pour the lye solution into your oils, stirring as you go.
- Stick blend to trace, which is when the mixture thickens to a light pudding consistency. This signals saponification has begun.
- Add fragrance, colour, or botanicals at light trace for best incorporation.
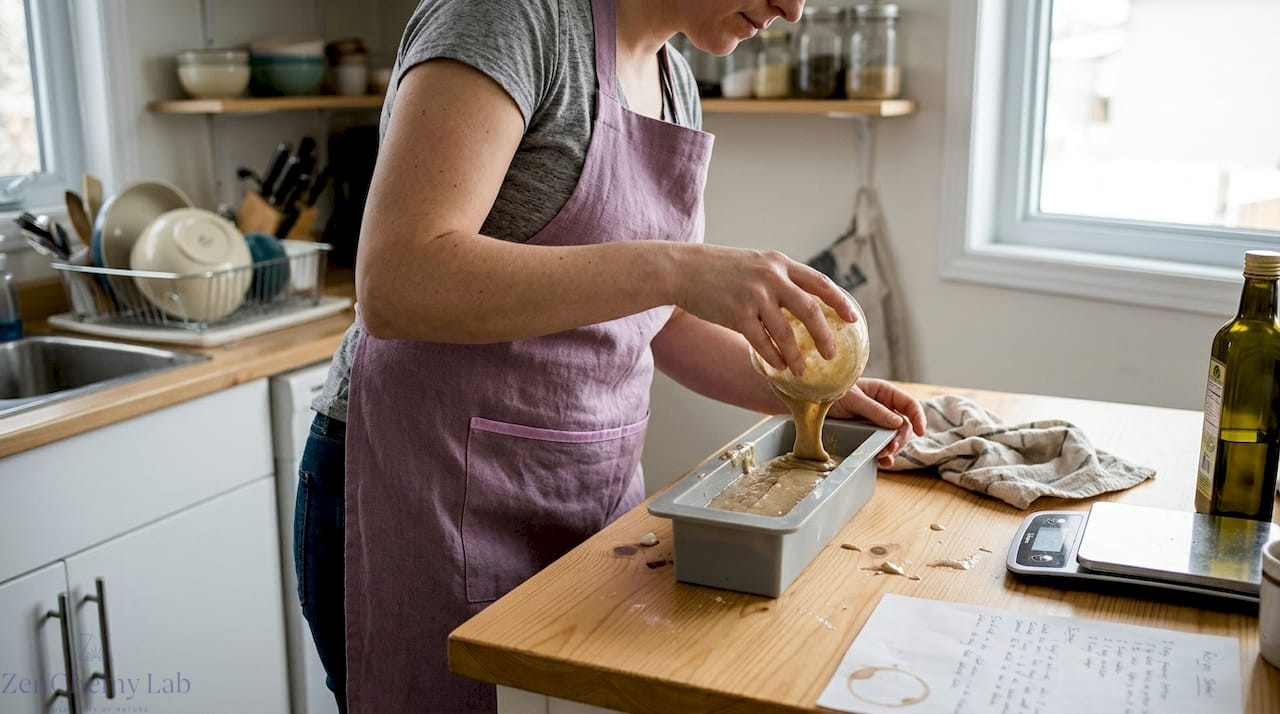
- Pour into moulds and cover with a towel or cardboard to insulate.
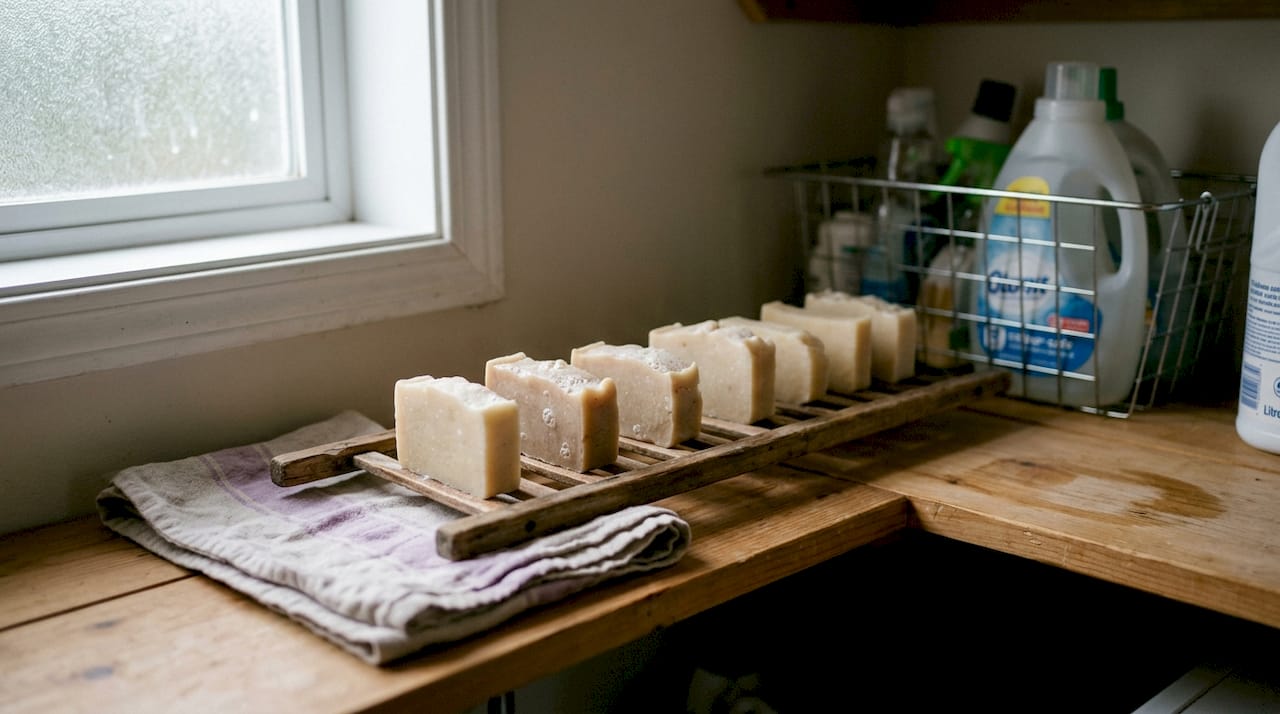
- Unmould after 24 to 48 hours, then cut into bars and place on a rack.
- Cure for 4 to 6 weeks in a cool, dry spot with good airflow.
The cold process method involves mixing oils and fats with a lye solution at cool temperatures, blending to trace, and curing for 4 to 6 weeks for the safest, most skin-friendly result. Curing isn’t optional. It’s when excess water evaporates and the bar hardens, making it last longer and feel gentler on skin. You can read more about the handmade soap benefits that this careful process produces.
Soap method comparison 📊
| Method | Skill level | Curing time | Customisation |
|---|---|---|---|
| Cold process | Beginner/intermediate | 4-6 weeks | High |
| Hot process | Intermediate | 1-2 weeks | Medium |
| Melt & pour | Beginner | None | Low |
For a deeper walkthrough, the cold process for beginners guide is an excellent reference. You can also browse cold processed soap options from ZenChemy Lab for inspiration on what a finished product looks and feels like.
Pro Tip: Always use distilled water and fresh oils. Tap water minerals can interfere with saponification, and rancid oils will ruin your batch before it even cures.
Personalising your soap: scents, colours, and superfatting
Now that you’ve mastered the basics, learn how to make each bar uniquely yours. Personalisation is where soap making becomes genuinely exciting, and where you can tailor every bar to a specific skin type or occasion.
Natural colourants to try 🌈
- French green clay: Earthy green, great for oily skin
- Turmeric powder: Warm golden yellow, brightening
- Spirulina: Deep green, antioxidant-rich
- Activated charcoal: Dramatic black, detoxifying
- Madder root powder: Soft pink to coral tones
- Cocoa powder: Warm brown, chocolatey scent bonus
Essential oils are your safest bet for fragrance. Use them at 1 to 3% of your total oil weight. Lavender, peppermint, and tea tree are reliable starters. Some fragrance oils can cause acceleration (where your soap thickens too fast), so always test a small amount first.
Superfatting is one of the most important concepts for gentle soap. It means leaving a small percentage of oils unsaponified so they remain free in the bar to condition your skin. A superfat of 5 to 20% leaves unsaponified oils for gentleness, with 5% being standard and 20% suited for 100% coconut oil recipes. Always use a lye calculator to adjust your lye amount when changing your superfat level. For more ideas on choosing natural ingredients for soap, exploring botanicals and clays is a great next step.
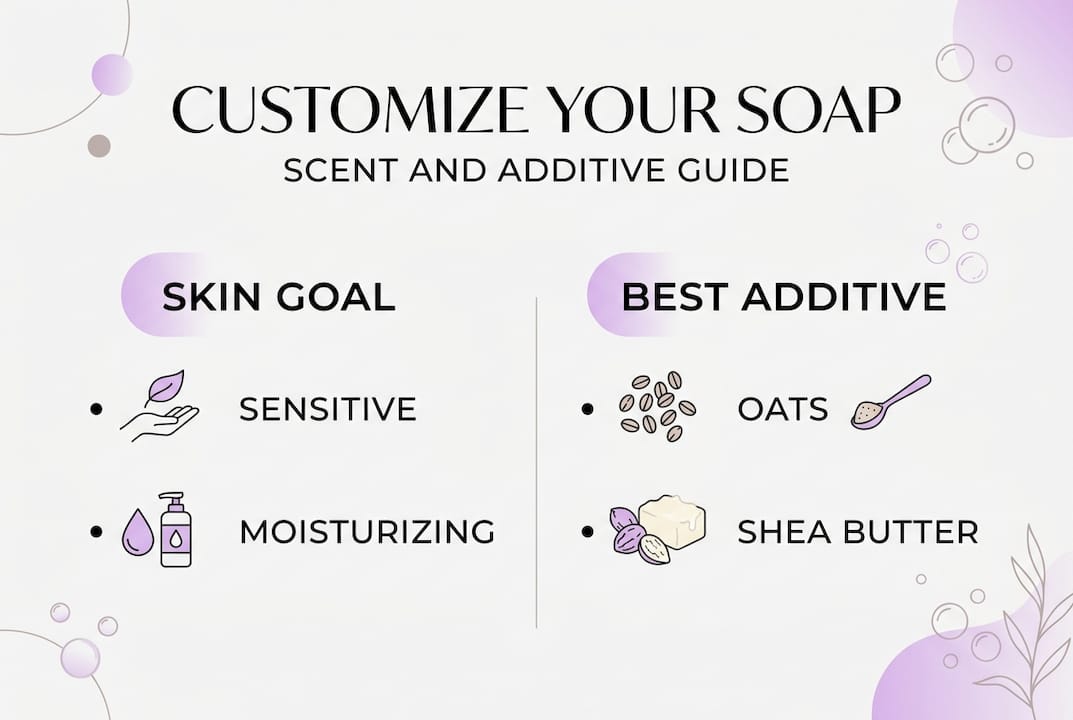
Scent and additive guide by skin goal 🎁
| Goal | Recommended scent | Best additive |
|---|---|---|
| Sensitive skin | Unscented or chamomile | Colloidal oat, calendula |
| Luxurious feel | Rose, sandalwood | Kaolin clay, rosehip oil |
| Gifting | Lavender, vanilla | Dried flowers, shimmer mica |
| Energising | Peppermint, eucalyptus | Spirulina, activated charcoal |
For coconut oil soap tips specifically, a higher superfat is especially important because coconut oil is very cleansing and can be drying at lower superfat levels.
Pro Tip: Stick with a 5 to 7% superfat for your first few batches. It’s the sweet spot for skin gentleness without making bars too soft or greasy.
Troubleshooting and finishing: curing, storage, and common mistakes
After pouring and initial set-up, you’ll want to make sure your bars turn out beautifully and safely. Even experienced soap makers encounter hiccups. Knowing what to look for saves your batch and your confidence.
Common soap making problems and fixes 🔧
- Seizing: Soap thickens suddenly in the bowl. Usually caused by accelerating fragrances or high hard oil ratios. Soap at a cooler temperature and work faster.
- Separation: Oils and lye solution split apart. Often from poor blending or temperature mismatch. Stick blend thoroughly and reheat gently if needed.
- Soda ash: A white, powdery layer on the surface. Harmless but cosmetic. Spray with isopropyl alcohol right after pouring, or insulate well.
- Soft soap: Bars won’t firm up. Usually too much soft oil or excess water. Try adding sodium lactate next time, or increase hard oils.
- Lye-heavy soap: Feels irritating or caustic. Check with a zap test or pH above 10, and rebatch or discard if confirmed.
To test your soap’s safety, use the zap test: touch a cured bar briefly to your tongue. A sharp, battery-like zap means active lye is still present. A safe bar feels like nothing, or mildly soapy.
⚠️ Important: If your soap zaps or burns your tongue, do not use it. Active lye means saponification is incomplete. Rebatch the soap by melting it down and reprocessing, or discard it safely.
For curing, store your cut bars on a wooden or wire rack, in a cool and dry room with good airflow. Avoid direct sunlight, which can fade colours and accelerate rancidity. A safe pH range for finished soap is 8 to 10. Compared to homemade and commercial soaps, handmade bars often sit at a gentler pH and contain none of the synthetic detergents found in mass-produced options. For more on common soapmaking problems, a detailed troubleshooting reference is worth bookmarking.
Pro Tip: Wrap cured bars in breathable paper (not plastic) and store in a cool, dark drawer. They’ll last 12 months or longer and make beautiful, thoughtful gifts.
What most DIY soap guides overlook
With your first batch made, it’s worth reflecting on what really matters in the DIY journey. Most guides load you up with complex recipes, exotic oils, and elaborate techniques before you’ve even made your first bar. We’ve seen it lead to overwhelm, wasted ingredients, and abandoned projects.
The truth? The most rewarding soap projects are almost always the simplest. A three-oil recipe made with care and quality ingredients will outperform a complicated formula rushed together. Purity comes first, not complexity.
Lye also deserves a reframe. Many beginners fear it, but with proper preparation and genuine respect for the material, it becomes just another ingredient. The real skincare benefits of handmade soap only exist because of saponification, and that requires lye. No lye, no soap. Full stop.
Mindful sourcing matters too. Knowing where your olive oil comes from, or choosing organic shea butter, elevates your soap from a craft project to a genuine self-care ritual. And when you hand someone a bar you made yourself, that intention transfers. It’s one of the most personal gifts you can give.
Take your natural skincare further with ZenChemy Lab
Ready to keep learning or find more natural beauty solutions? Whether you’re just starting out or refining your craft, ZenChemy Lab is here to support your journey.
Explore the why handmade matters guide to deepen your understanding of what makes artisan soap genuinely better for your skin. If you’d love a beautifully crafted bar while your own batch cures, browse the artisan soap collection for handmade, scented options formulated and produced right here in Canada. And if you’re curious about the broader world of clean beauty, the natural vs synthetic skincare guide breaks down what science actually says, so you can make truly informed choices for your skin and your loved ones.
Frequently asked questions
Do I need to use lye for all handmade soap?
Yes, all true soap requires lye, but you won’t find any lye left in your finished, cured bars. The cold process method consumes lye entirely during saponification, leaving only soap, glycerin, and your chosen oils.
Is handmade soap safe for sensitive skin?
Properly made and cured handmade soap is often gentler than commercial bars, especially when you use a superfat of 5 to 20% and choose pure, skin-friendly ingredients tailored to your needs.
How long does homemade soap need to cure?
Cold process soap cures for 4 to 6 weeks. This allows excess water to evaporate and the bar to harden, producing a longer-lasting and milder result.
What should I do if my soap doesn’t harden?
A soft soap usually means too much soft oil or excess water in your recipe. Extend the cure time first, then adjust your next batch by increasing hard oils or adding sodium lactate.
Recommended
- Handmade soap: real skincare benefits you’ll notice – ZenChemy Lab
- Handmade soap versus Commercially made soaps – ZenChemy Lab
- Artisan Soap Collection – Handmade – ZenChemy Lab
- Understanding pH Levels in Handmade Soap: What Your Skin Really Needs – ZenChemy Lab
- Build an organic skincare workflow: 90%+ satisfaction
- Kosmetik Workflow für Einsteiger: Schritt-für-Schritt