TL;DR:
- A five-step lip routine involves softening, gentle exfoliation, rinsing, applying a hydrating treatment, and protection, recommended 1–2 times weekly. Exfoliation should be skipped if lips are cracked, bleeding, or have active cold sores to prevent further damage. Lip repair relies on occlusive and emollient ingredients like beeswax and lanolin to restore the skin’s barrier.
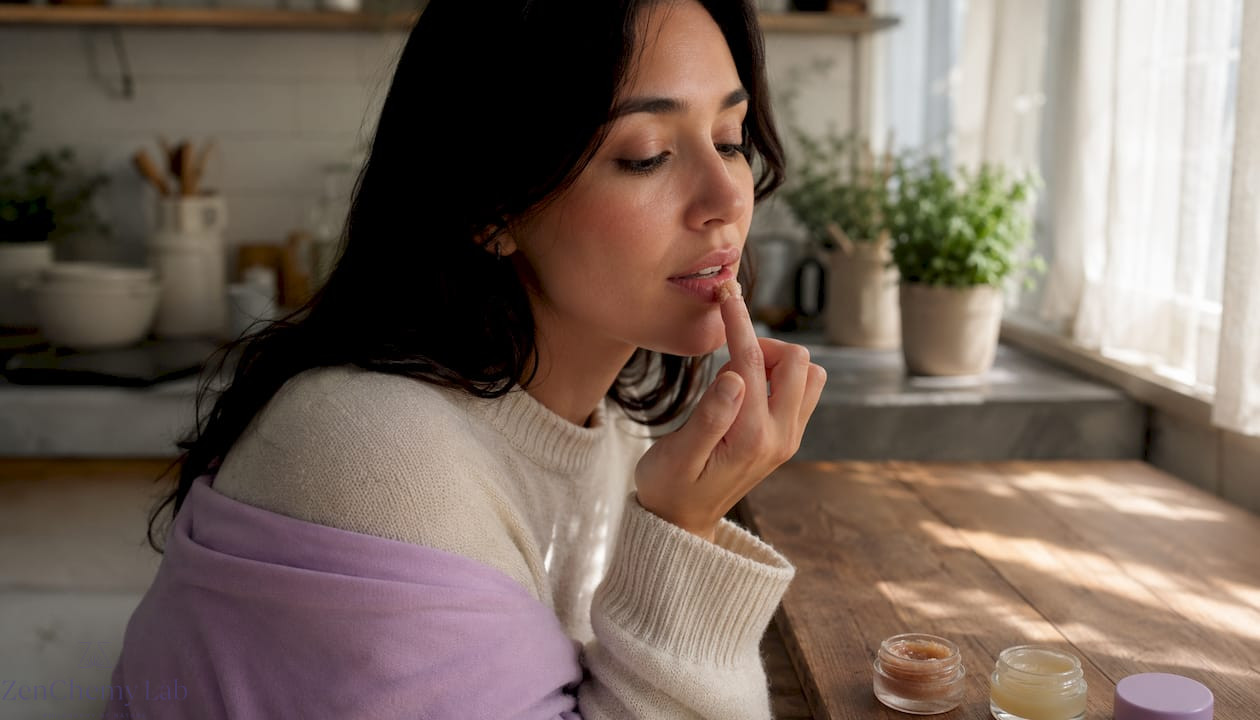
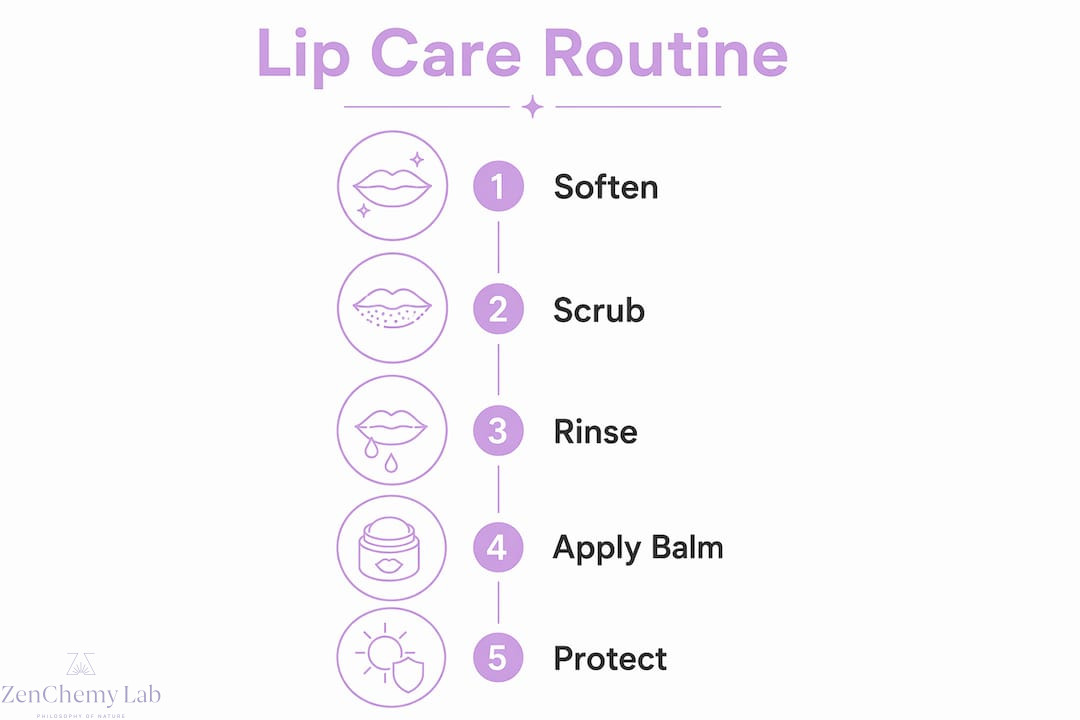
Your lip scrub and treatment routine in five steps: soften → gently exfoliate (about 30 seconds) → rinse and pat dry → apply an occlusive or emollient treatment → protect with SPF during the day or an intensive mask overnight. That is the whole routine. Most people need it 1–2 times per week, not daily. The single most important safety rule: never exfoliate cracked, bleeding, or actively inflamed lips. If your lips are in that state, skip the scrub entirely and focus on gentle hydration until they heal.
✅ Quick safety callout: Cracking, open sores, or active cold sores are all signs to pause exfoliation. Reach for an occlusive balm instead and let the barrier recover first.
Why does this routine work? Lips lack sebaceous glands, so they cannot produce their own protective oils the way the rest of your facial skin can. That makes them uniquely dependent on external hydration and barrier support. A gentle scrub removes the flaky dead cells that block absorption, so the balm or treatment you apply immediately after can actually penetrate and do its job.
Table of Contents
- What does a complete lip scrub and treatment routine look like?
- How often should you exfoliate, and when should you stop?
- Which ingredients should you choose, and what should you avoid?
- How should you layer treatments after exfoliation?
- Safe DIY scrub options you can make at home
- Why lipid-mimicking ingredients are the core of effective lip repair
- Key takeaways
- Consistency matters more than the perfect product
- Zenchemylab’s botanical lip care, made in Canada
- Useful sources and further reading
What does a complete lip scrub and treatment routine look like?
Follow these five steps in order. Sequence matters here, because each step prepares the surface for the next.
-
Prepare your lips. Remove any lip product with a clean fingertip or soft cloth. Then briefly soften the skin: press a warm (not hot) damp cloth against your lips for 20–30 seconds, or dab on a drop of jojoba or sweet almond oil. Softened skin exfoliates more evenly and is less likely to tear.
-
Apply the scrub. Use a pea-sized amount of a fine-sugar scrub on a clean fingertip. Work in gentle circular motions for no more than 30 seconds. Fine sugar granules are the right particle size for lip skin; coarse salt or crushed nut shells are too abrasive for this thin tissue. Keep pressure light — you are buffing, not sanding.
-
Rinse and pat dry. Rinse with lukewarm water and pat (never rub) with a soft cloth. If your scrub contains nourishing oils that you want to leave on briefly as a mini mask, wait 60 seconds before rinsing. Either way, your lips should feel smooth and slightly tacky, not raw.
-
Apply your treatment. This is the most important step. A gentle scrub buffs away dead skin and makes subsequent balms and treatments far more effective, so do not skip this window. Apply a rich emollient or occlusive balm immediately while the skin is still slightly damp. Look for beeswax, lanolin, cocoa butter, or shea butter on the label. These ingredients form a breathable barrier that reduces transepidermal water loss (TEWL) while lipid-like molecules soften the tissue underneath.
-
Protect. During the day, finish with an SPF 15–30 lip balm and reapply after eating or extended time outdoors. At night, swap SPF for an intensive overnight mask or a thick occlusive balm. Night is when your skin repairs itself, so a heavier layer of beeswax or lanolin at bedtime pays dividends by morning.
Pro Tip: Use your fingertip rather than a toothbrush. Toothbrush bristles are too stiff for lip skin and can cause micro-tears, especially near the lip border. A clean fingertip gives you full pressure control.
- ✔ Always apply treatment immediately after rinsing — the window of maximum absorption is brief.
- ✔ One pass per area is enough; going over the same spot repeatedly adds abrasion without benefit.
- ✔ If your lips feel tight or sting after the scrub, rinse immediately and apply balm. That is a sign to use less pressure or a finer particle next time.
How often should you exfoliate, and when should you stop?
Frequency depends on your baseline lip condition, not on a fixed calendar.
- Dry or flaky lips: 1–2 times per week is the standard recommendation from dermatologists.
- Already-soft lips: Once a week or less is plenty. Exfoliating healthy skin too often strips the barrier rather than improving it.
- Seasonal adjustment: In Canadian winters, cold air and indoor heating pull moisture from lips quickly, so you may need the full twice-weekly cadence. In summer, reduce frequency if your lips are sun-exposed and already slightly sensitised.
Signs you should skip exfoliation entirely
- Visible cracks or splits in the lip surface
- Any bleeding, even minor
- Active cold sores or herpetic lesions — exfoliation can worsen viral lesions and spread infection
- Severe peeling that feels painful to the touch
- A burning or stinging sensation before you even begin
Over-exfoliation causes a cycle of sensitivity because lip skin is thinner than the rest of your face and has no oil glands to buffer the damage. If you have gone too far, the recovery protocol is straightforward: stop all scrubs, apply a plain occlusive balm several times a day, and avoid any active ingredients (retinol, strong AHAs, flavouring irritants) until the barrier has healed. A short course of hydrating overnight masks speeds recovery noticeably.
Pro Tip: If you have eczema or a diagnosed skin condition affecting your lips, check with a clinician before adding any exfoliation step. The standard frequency rules do not always apply.
| Lip condition | Recommended frequency |
|---|---|
| Dry or flaky | 1–2 times per week |
| Normal / soft | Once a week or less |
| Cracked, bleeding, or irritated | Pause entirely; focus on occlusive hydration |
| Active cold sore | Do not exfoliate until fully healed |
Which ingredients should you choose, and what should you avoid?
✅ Ingredients to look for
- Fine sugar — the safest physical exfoliant for lips; dissolves as it works, limiting over-abrasion
- Shea butter and cocoa butter — rich emollients that supply lipid-like molecules to soften and repair
- Beeswax — the classic occlusive; forms a breathable barrier to reduce TEWL
- Lanolin — a lipid-mimic that closely resembles the skin’s own oils; highly effective for overnight repair (note: patch-test first, as lanolin can be allergenic for some people; shea or mango butter are good plant-based alternatives)
- Hyaluronic acid and glycerin — humectants that draw moisture into the tissue; best used in a serum or light layer before your occlusive balm
- Jojoba oil — structurally similar to skin lipids, absorbs well, and works as a conditioning pre-scrub softener
❌ Ingredients to avoid
- High-strength AHAs or BHAs applied directly to lip skin without professional guidance
- Coarse salt or crushed nut-shell particles — too large and irregular for the thin lip stratum corneum
- Strong synthetic fragrances or artificial flavourings, especially cinnamon and menthol if you are sensitivity-prone
- Essential oils at high concentrations — a few drops in a finished formula is fine, but undiluted application is not
Because lips lack oil-producing glands, they cannot self-replenish the lipid layer the way other skin can. That is why lipid-mimicking ingredients like lanolin and botanical butters are not a luxury add-on — they are doing the structural work your skin cannot do on its own.
Pro Tip: When trying a new balm or scrub, apply a small amount to the inner arm and wait 24 hours before using it on your lips. Lips are more reactive than arm skin, but this patch test still catches most contact sensitivities.
How should you layer treatments after exfoliation?
The sequence of your follow-up products matters as much as the products themselves. Apply in this order:
- Hydrating layer (optional): A drop of hyaluronic acid serum or a light facial oil applied to slightly damp lips draws moisture into the tissue before you seal it in.
- Emollient: A butter-rich balm (shea, cocoa butter, mango butter) softens and fills the spaces between skin cells.
- Occlusive: A beeswax or lanolin-based balm on top locks everything in and prevents evaporation.
Daytime care
A lightweight emollient balm with SPF 15–30 is the practical daytime choice. Reapply every two hours when outdoors, and always after eating or drinking. Zenchemylab’s natural lip balm range includes options formulated with plant-based butters that sit comfortably under a tinted or SPF product.

Night-time care
This is when you can go heavier. Intensive overnight masks are occlusive and concentrated, and work best applied right after your evening scrub session. Look for beeswax, lanolin, and cocoa butter together on the label. Anhydrous balms that combine occlusives with lipid-rich butters consistently outperform lightweight oils alone for overnight repair. Zenchemylab’s Natural Beeswax Lip Balm is formulated with exactly this occlusive-first approach and is produced in Canada.
Pro Tip: Apply your night balm generously enough that you can feel a slight film on your lips. A thin swipe will evaporate before morning; a proper occlusive layer stays put.
- ✔ Daytime: emollient + SPF, reapply regularly
- ✔ Night-time: thick occlusive balm or overnight mask after exfoliation
- ✔ Label check: occlusive + emollient + minimal fragrance = the right combination
Safe DIY scrub options you can make at home
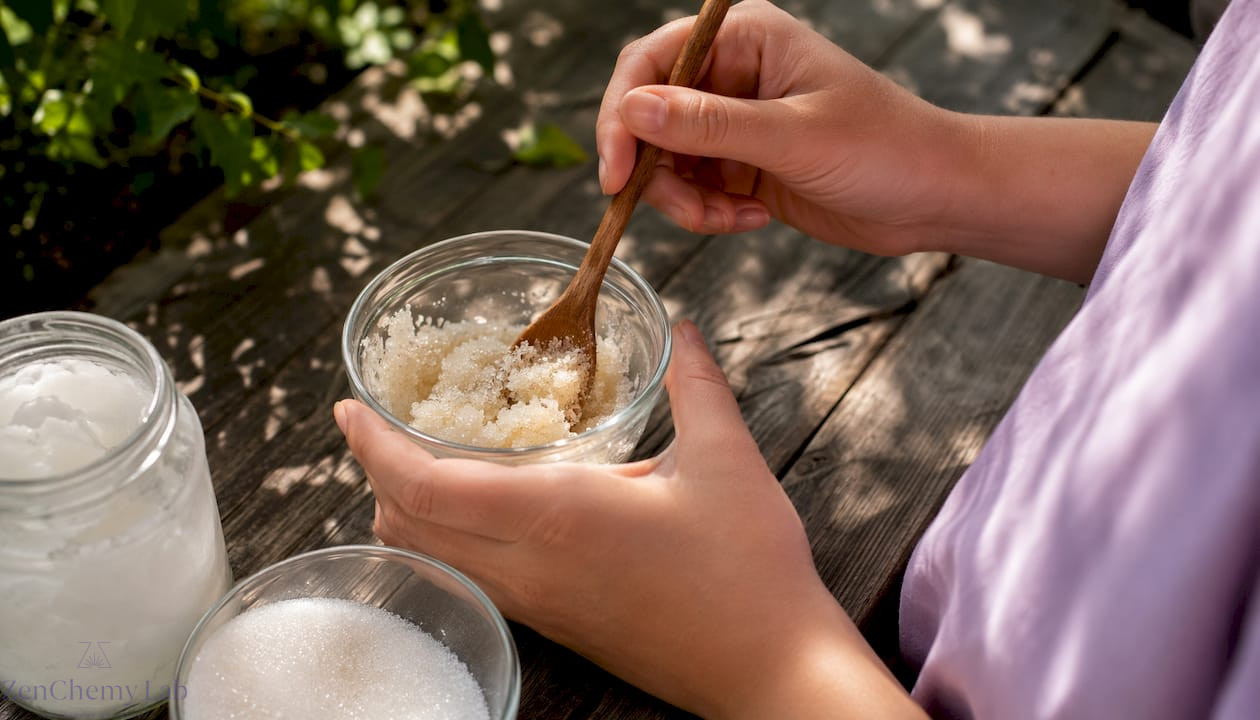
A homemade lip scrub does not need to be complicated. The most reliable recipe is also the simplest.
Basic sugar-and-oil scrub
- Measure 2 teaspoons of fine white sugar into a clean, dry glass jar.
- Add 1 tablespoon of a nourishing oil — jojoba, sweet almond, or coconut oil all work well.
- Stir until combined. Add a few extra drops of oil if you prefer a looser texture.
- Apply a pea-sized amount to your lips with a clean fingertip, massage gently for 30 seconds, then rinse.
This basic sugar-and-oil formula is a safe, effective at-home option when made and stored properly.
For very sensitive lips, skip the scrub entirely and try a no-abrasive alternative: massage a drop of oil onto dry lips for 60 seconds, then gently buff with a warm damp cloth. You get light exfoliation without any particle contact.
Hygiene rules for DIY products
- Use clean tools and single-use applicators where possible; avoid double-dipping fingers into the jar.
- Store your DIY scrub in a cool, dry place away from direct sunlight.
- Oil-based mixes without a preservative should be discarded after 6–12 months, sooner if the oil smells rancid.
- Avoid adding essential oils or strong flavourings to DIY scrubs if you have sensitive lips or known skin allergies. Cinnamon and lemongrass in particular are common irritants at even low concentrations.
For readers interested in the broader world of safe cosmetic formulation, Zenchemylab’s educational content covers ingredient functions and DIY safety in more detail.
Why lipid-mimicking ingredients are the core of effective lip repair
Lips are the only facial skin that completely lacks sebaceous glands. That single fact explains why every effective lip repair strategy comes back to the same two principles: occlusion to stop water from escaping, and emollience to replace the lipids the skin cannot produce itself. Lightweight oils alone cannot do both jobs. A well-formulated anhydrous balm — one that pairs a wax barrier with lipid-rich butters or lanolin — addresses both simultaneously, which is why it outperforms a simple oil for overnight repair.
At Zenchemylab, our formulation approach starts with this rationale. We screen every ingredient for allergen risk and recommend patch testing for lanolin-containing products, since lanolin sensitivity, while uncommon, does occur. For those who prefer a fully plant-based option, mango butter and shea butter provide comparable lipid-mimicking emollience without the allergen concern.
The layering principle follows directly from this: a thin humectant layer first (glycerin, hyaluronic acid) to draw moisture in, then an emollient butter to soften, then a wax-based occlusive on top to seal. Each layer has a distinct function, and skipping the occlusive step means the hydration you just added will evaporate within the hour.
| Ingredient type | Example ingredients | Primary function |
|---|---|---|
| Occlusive | Beeswax, candelilla wax | Reduces TEWL; forms a breathable barrier |
| Emollient | Lanolin, cocoa butter, shea butter | Softens tissue; mimics skin lipids |
| Humectant | Glycerin, hyaluronic acid | Draws moisture into the skin |
| Physical exfoliant | Fine sugar | Buffs dead cells; safe particle size for lips |
For a deeper look at how the skin lipid barrier works and how to support it naturally, Zenchemylab’s barrier repair guide covers the science in plain language.
Pro Tip: Apply your humectant layer to lips that are slightly damp — just patted dry, not bone dry. Humectants need water present in the skin to work; applying them to completely dry lips can actually pull moisture from deeper tissue instead.
Key takeaways
A safe, repeatable lip care routine pairs gentle exfoliation 1–2 times per week with an immediate occlusive treatment to lock in hydration and support barrier repair.
| Point | Details |
|---|---|
| Five-step routine | Soften → scrub 30 seconds → rinse → apply emollient/occlusive → protect with SPF or overnight mask. |
| Frequency rule | Exfoliate a couple of times per week; pause entirely if lips are cracked, bleeding, or have an active cold sore. |
| Ingredient priorities | Choose lipid-mimics and occlusives (beeswax, lanolin, cocoa butter); avoid coarse particles and strong actives; patch-test lanolin. |
| Over-exfoliation recovery | Stop all scrubs, apply occlusive balm several times daily, and avoid active ingredients until the barrier heals. |
| Zenchemylab recommendation | The Natural Beeswax Lip Balm uses an occlusive-first formula produced in Canada — ideal for the treatment step day or night. |
Consistency matters more than the perfect product
The conventional wisdom around lip care tends to focus on finding the “right” scrub or the “best” balm, as though the product alone is what delivers soft lips. In practice, the routine and its frequency are what actually move the needle. A modest sugar-and-oil scrub followed immediately by a well-formulated occlusive balm, repeated consistently once or twice a week, will outperform an expensive scrub used sporadically with no follow-up treatment.
What I find most overlooked is the timing of the treatment step. Most people rinse their scrub, feel the smoothness, and consider the job done. But that freshly exfoliated surface is at its most receptive in the two to three minutes right after rinsing. Applying your balm in that window is not optional — it is the mechanism by which exfoliation actually delivers lasting softness rather than temporary smoothness followed by rebound dryness.
Zenchemylab’s approach to formulation is grounded in this same logic: ingredient transparency, lipid-mimicking actives, and no unnecessary fillers. If you want to extend your routine beyond lips, the natural skincare routine guide on the Zenchemylab site applies the same barrier-first principles to the full face.
Zenchemylab’s botanical lip care, made in Canada
Soft, healthy lips come from the right products used in the right order. Zenchemylab offers two pieces of that routine, both handcrafted in Canada with non-toxic, cruelty-free ingredients.

The Zenchemylab Botanical Lip Scrub uses fine sugar granules and plant-based oils to buff away flakes gently without over-abrading the thin lip surface. It fits directly into Step 2 of the routine above. The Zenchemylab Nourishing Lip Balm follows the occlusive-first formulation principle: beeswax forms the barrier, botanical butters supply the emollience, and the result is a treatment that holds through the night or reapplies cleanly over SPF during the day. The Natural Beeswax Lip Balm is the specific product to reach for at Step 4.
Browse the full body care collection at Zenchemylab.ca, or read the natural beauty guide for a broader look at how science and sustainability meet in every formula.
Useful sources and further reading
The following resources informed this guide and are worth bookmarking for deeper reading.
- Lip care routine — Healthline: Clinical-style overview covering frequency, ingredients, and dermatologist guidance on exfoliation safety. Best for evidence-backed frequency and over-exfoliation cautions.
- Lip care routine 101 — NYX Professional Makeup: Practical how-to covering SPF guidance and the sebaceous-gland deficit that makes lips uniquely vulnerable to dryness.
- The complete guide to lip care — Blush & Bloom: Covers scrubs, masks, and layering; useful for understanding how exfoliation improves product uptake.
- How to make natural lip balm — By Kristina Markovic: Formulation-focused guide explaining anhydrous balm ratios, occlusive and emollient roles, and hygiene for DIY products.
- Lip care routine — Abreva: Specific guidance on cold-sore contraindications for exfoliation; a practical clinical reference.
- How to make lip balm — The Old Farmer’s Almanac: Accessible DIY recipe guide with natural ingredients; good for readers new to home formulation.
- Waterless body scrub safety and technique — Skin Anthology: Expert content on waterless exfoliation and scrub safety; relevant for understanding particle size and technique across body and lip applications.
- What is the skin lipid barrier and how to repair it naturally — Zenchemylab: In-depth barrier repair science explained in plain language; the foundational read for understanding why occlusion and emollience matter.
| Source type | Best used for |
|---|---|
| Healthline / Abreva | Clinical frequency rules, contraindications, cold-sore cautions |
| By Kristina Markovic / Old Farmer’s Almanac | DIY formulation ratios, ingredient functions, hygiene |
| Blush & Bloom / NYX | Practical how-to steps, SPF guidance, product-uptake rationale |
| Zenchemylab barrier repair guide | Lipid barrier science, occlusion vs emollience, natural repair strategies |