
TL;DR:
- Natural face masks use organic ingredients to nourish and hydrate skin without synthetic additives. Proper ingredient selection, timing, and patch testing are essential for safe and effective results. Store dry mixes in a sealed jar and use masks weekly as part of a balanced skincare routine.
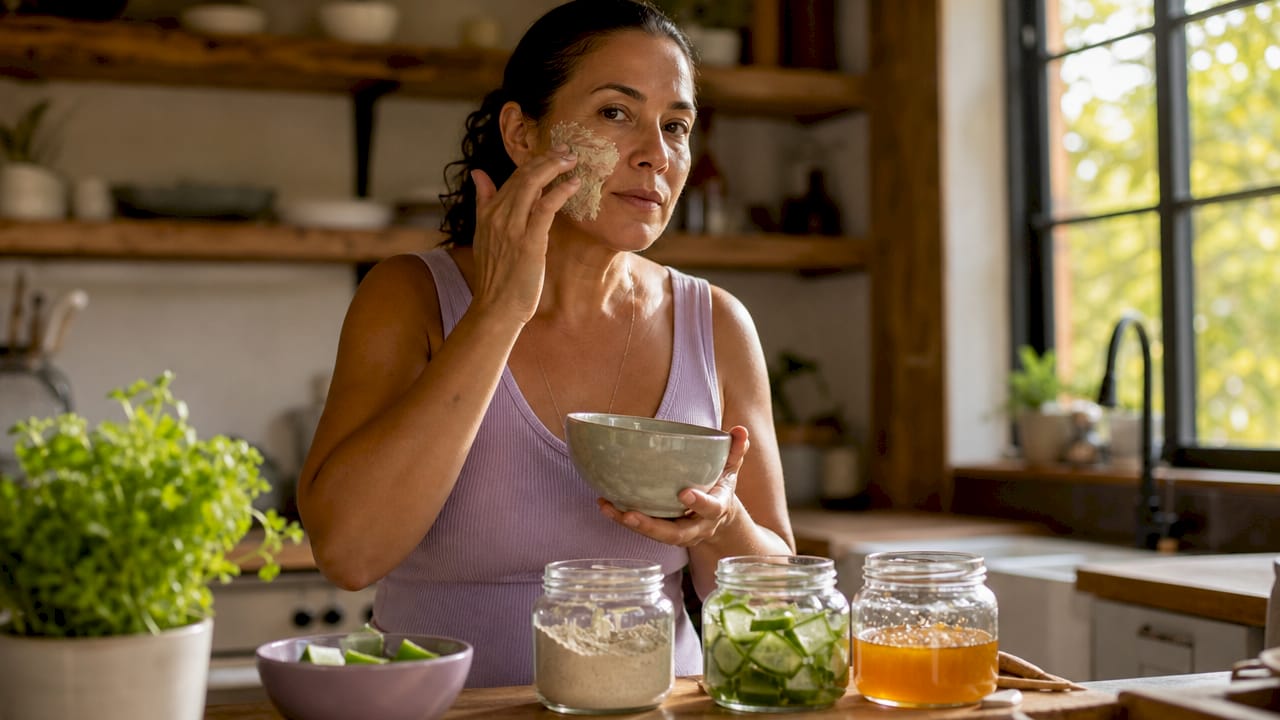
Natural face masks are homemade skincare treatments that use organic ingredients to nourish, hydrate, and address specific skin concerns without synthetic additives. This guide to natural face masks covers everything you need: how to choose the right ingredients for your skin type, a clear step-by-step face mask process, and the safety rules that keep your skin healthy. Whether you are new to DIY beauty or already have a collection of natural ingredients for glowing skin, this guide gives you the practical knowledge to get real results at home.
How to choose the right natural ingredients for your skin type
The most effective homemade face mask recipes start with matching ingredients to your skin’s actual needs. Using the wrong base, even a natural one, can trigger breakouts, dryness, or irritation. Knowing your skin type is the first step in any solid DIY face mask guide.
Here is a quick breakdown by skin type:
- Dry skin: Honey is a natural humectant, meaning it draws moisture into the skin. Avocado and oat flour add lipids and soothing compounds that reduce transepidermal water loss (TEWL).
- Oily or acne-prone skin: Kaolin and bentonite clay absorb excess sebum and draw out impurities through ion exchange. French green clay works similarly and suits combination skin well.
- Sensitive skin: Oat flour (colloidal oatmeal), aloe vera gel, and plain full-fat yogurt are gentle choices. They calm redness and support the skin barrier without harsh actives.
- Dull or uneven skin: Coffee grounds, turmeric, and papaya enzyme powder gently exfoliate dead cells and brighten the complexion. These are the go-to ingredients for DIY face masks for glowing skin.
- Ageing or dehydrated skin: Rose hip powder, green tea, and raw honey deliver antioxidants and hydration together.
✔ Always buy food-grade or cosmetic-grade versions of these ingredients. Culinary-grade is fine for most kitchen staples, but avoid anything with added salt, sugar, or flavouring.
Safety and patch testing

Patch testing is mandatory before applying any new mask to your face. Mix a small amount of the recipe and apply it to the inner arm or behind the ear. Wait 24 hours. If you see redness, swelling, or itching, do not use that ingredient on your face. Natural does not mean hypoallergenic. Honey, for example, can trigger reactions in people with bee-related allergies.
Pro Tip: If you are using a new ingredient for the first time, test it on its own, not as part of a full recipe. That way, if a reaction occurs, you know exactly which ingredient caused it.
Step-by-step process to prepare and apply a natural face mask
A consistent step-by-step natural face mask process makes the difference between a treatment that works and one that irritates. Follow these steps each time.
What you need before you start
Gather your supplies before mixing anything:
- Glass, ceramic, or wooden bowl and spoon
- Measuring spoons
- Clean headband or hair clip
- Soft muslin cloth or flannel for removal
- Your chosen ingredients at room temperature
Never use metal tools with bentonite or kaolin clay. Metal reacts with clay and reduces its ion-exchange effectiveness. This is one of the most overlooked preparation mistakes in DIY skincare.
The step-by-step face mask process
- Cleanse your face. Wash with a gentle cleanser and pat dry. Applying a mask to dirty skin traps bacteria and reduces ingredient absorption.
- Mix your mask. Combine dry ingredients first, then add wet ingredients gradually until you reach a smooth, spreadable paste. Avoid over-mixing, which can introduce air bubbles and thin the texture.
- Apply evenly. Use clean fingers or a silicone brush. Spread a thin, even layer across the face, avoiding the eye area and lips. A thin layer dries more evenly than a thick one.
- Set a timer. Contact time matters: coffee-based masks need about 10 minutes, hydrating or cooling masks can stay on up to 20 minutes, and clay masks work best at 8–12 minutes. Leaving clay on until it cracks is a common mistake covered in the next section.
- Remove gently. Dampen your muslin cloth with warm water and wipe the mask away in soft, circular motions. Rinse with cool water to close pores.
- Follow up immediately. Apply a hydrating toner or serum while skin is still slightly damp, then seal with a moisturiser. Skin hydration drops quickly after a wash-off treatment, so do not skip this step.
Timing reference by mask type
| Mask type | Recommended contact time | Key reason |
|---|---|---|
| Clay (kaolin, bentonite) | 8–12 minutes | Prevents over-drying and moisture loss |
| Coffee or exfoliating | ~10 minutes | Enough time for gentle physical action |
| Hydrating (honey, aloe) | 15–20 minutes | Allows humectants to draw in moisture |
| Yogurt or enzyme | 10–15 minutes | Mild acids need time to work without irritating |
Pro Tip: Set a phone timer the moment you finish applying. It is easy to lose track of time, and even five extra minutes on a clay mask can leave your skin feeling tight and stripped.
What mistakes should you avoid with natural face masks?
Even well-chosen ingredients can cause problems when applied incorrectly. These are the most common errors and how to fix them.
-
Leaving clay masks on too long. A cracking or tight sensation signals that the mask has gone past its useful point. Fully dry clay masks draw moisture out of the skin rather than from within pores. Remove the mask when it is still slightly tacky to the touch.
-
Skipping the patch test. This is the single most skipped step in DIY skincare. Natural ingredients can trigger allergic reactions, and the face is far more sensitive than the inner arm. A 24-hour patch test takes almost no effort and prevents days of irritation.
-
Using too much of a strong active. Turmeric stains skin yellow if used in large amounts. Lemon juice is too acidic for direct facial use and can cause photosensitivity. Stick to small quantities of high-impact ingredients.
-
Storing wet masks for too long. Fresh masks made with water-based ingredients like aloe vera or kefir are perishable. Preparing a large batch and leaving it on the counter for a week is a hygiene risk.
-
Applying masks to broken or sunburned skin. Even gentle ingredients like oat flour can aggravate compromised skin. Wait until your skin barrier has recovered before masking.
Remember: The goal of a DIY face mask is targeted, short-term skin support. It is not a replacement for your daily cleanser, moisturiser, or SPF. Masks work best as a weekly addition to an existing routine, not as a standalone treatment.
If irritation occurs after a mask, rinse immediately with cool water and apply a plain, fragrance-free moisturiser. If redness persists beyond 24 hours, discontinue that recipe and consider consulting a dermatologist.
Storage and safety guidelines for homemade natural face masks
Proper storage keeps your ingredients potent and your skin safe. The rules differ significantly depending on whether your mask is a dry blend or a freshly mixed wet preparation.
| Mask format | Storage method | Shelf life | Key consideration |
|---|---|---|---|
| Dry powder blend (clay, oat, herb powders) | Sealed glass jar, cool dry place | Up to 3 months | Keep moisture-free; add a silica packet if humid |
| Wet fresh mix (aloe, kefir, yogurt) | Airtight container, refrigerated | A few days at most | Use quickly for maximum benefit and safety |
| Oil-based blend (honey, oil, powder) | Small glass jar, refrigerated | Up to 1 week | Watch for separation or off smell |
| Enzyme or fruit-based | Refrigerated only | 1–2 days | Enzymes degrade quickly at room temperature |
Dry blends are the most practical option for regular use. Pre-mixing your dry ingredients, such as kaolin clay, oat flour, and dried lavender, means you only need to add a liquid at application time. Zenchemylab’s spirulina dry face mask range follows this exact principle: stable, shelf-ready powder that you activate fresh each time.
Always use clean, dry utensils when scooping from a dry blend. Introducing moisture into a sealed jar accelerates bacterial growth and shortens shelf life. Label your jars with the mix date so you never guess how old a blend is.
Key takeaways
Natural face masks work best when you match ingredients to your skin type, follow precise timing, and treat them as a weekly addition to your daily skincare routine.
| Point | Details |
|---|---|
| Match ingredients to skin type | Honey suits dry skin; clay suits oily skin; oat flour suits sensitive skin. |
| Patch test every new recipe | Apply to inner arm for 24 hours before using on your face to avoid reactions. |
| Follow contact time guidelines | Clay masks: 8–12 minutes; hydrating masks: up to 20 minutes; coffee masks: ~10 minutes. |
| Store correctly by format | Dry blends last up to 3 months sealed; wet fresh mixes must be refrigerated and used within days. |
| Masks support, not replace, your routine | Always follow with moisturiser and apply broad-spectrum SPF 30+ during daytime. |
What I have learned from years of natural masking
Natural face masks are one of the most rewarding parts of a DIY skincare practice. They are also one of the most misunderstood.
The biggest misconception I see is that more is better. More time on the skin, more ingredients in the bowl, more sessions per week. In practice, the opposite is true. A simple two-ingredient mask applied correctly and removed at the right moment outperforms a complicated ten-ingredient recipe left on too long. Skin responds to consistency and gentleness, not intensity.
I always recommend that beginners apply masks 1–2 times per week and stick with that frequency for at least 2–4 weeks before drawing conclusions. Skin takes time to respond. Changing recipes every few days makes it impossible to know what is actually working.
The other habit that genuinely changes results is post-mask care. Applying a moisturiser immediately after removal, while skin is still slightly damp, locks in the treatment benefits. And if you are masking in the morning or heading outside afterward, broad-spectrum SPF 30+ is non-negotiable. Many natural ingredients, especially exfoliating ones, increase photosensitivity temporarily.
Start simple. Patch test. Be patient. That is the honest advice that actually produces results.
— Alex
Natural skincare made simple with Zenchemylab
Zenchemylab was built on the belief that the best skincare starts with real, recognisable ingredients.

If this guide has inspired you to go deeper into natural beauty, Zenchemylab’s science-meets-sustainability approach covers the latest in botanical cosmetics, clean formulation, and ingredient science for 2026. For readers ready to build a full routine, the natural skincare routine tips guide walks you through every step, from cleansing to SPF. Zenchemylab’s artisanal products use the same ingredient-first philosophy as the recipes in this guide, so you can trust what goes on your skin.
FAQ
What is a natural face mask?
A natural face mask is a topical skincare treatment made from organic or minimally processed ingredients such as clay, honey, oat flour, or aloe vera. It is applied to the face for a set period to address specific skin concerns like dryness, oiliness, or dullness.
How long should you leave a natural face mask on?
Contact time depends on the ingredients. Clay masks work best at 8–12 minutes, hydrating masks can stay on up to 20 minutes, and coffee-based masks need about 10 minutes.
How often should you use a homemade face mask?
Beginners should use masks 1–2 times per week and assess skin response over 2–4 weeks before increasing frequency.
How do you store a homemade face mask?
Dry powder blends can be stored in a sealed jar for up to 3 months. Wet fresh masks made with aloe, kefir, or yogurt must be refrigerated and used within a few days.
Do you need to moisturise after a natural face mask?
Yes. Applying a moisturiser immediately after mask removal protects the skin barrier and seals in the treatment benefits. During daytime, follow with a broad-spectrum SPF 30+ to protect freshly treated skin.