TL;DR:
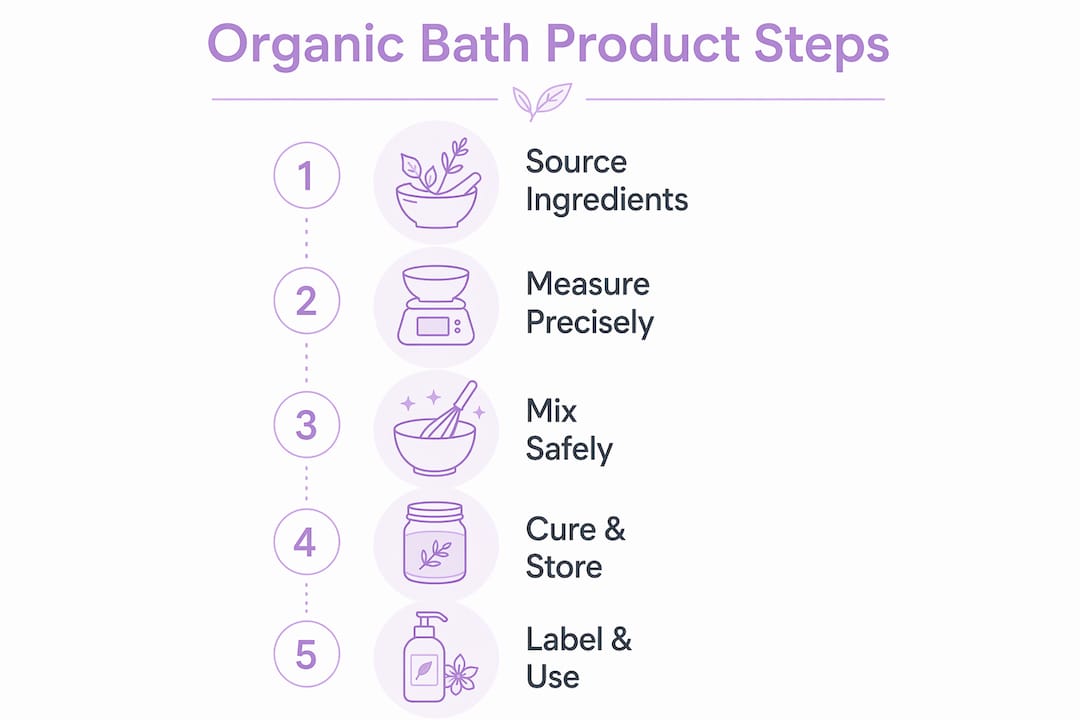
- Making organic bath products involves sourcing certified ingredients, understanding proper formulation, and following safety and labeling regulations. Proper certification and accurate labelling are essential for legally claiming “organic” and building consumer trust. Patience and precise techniques, such as thorough curing and mixing, are key to successful, safe DIY skincare creations.
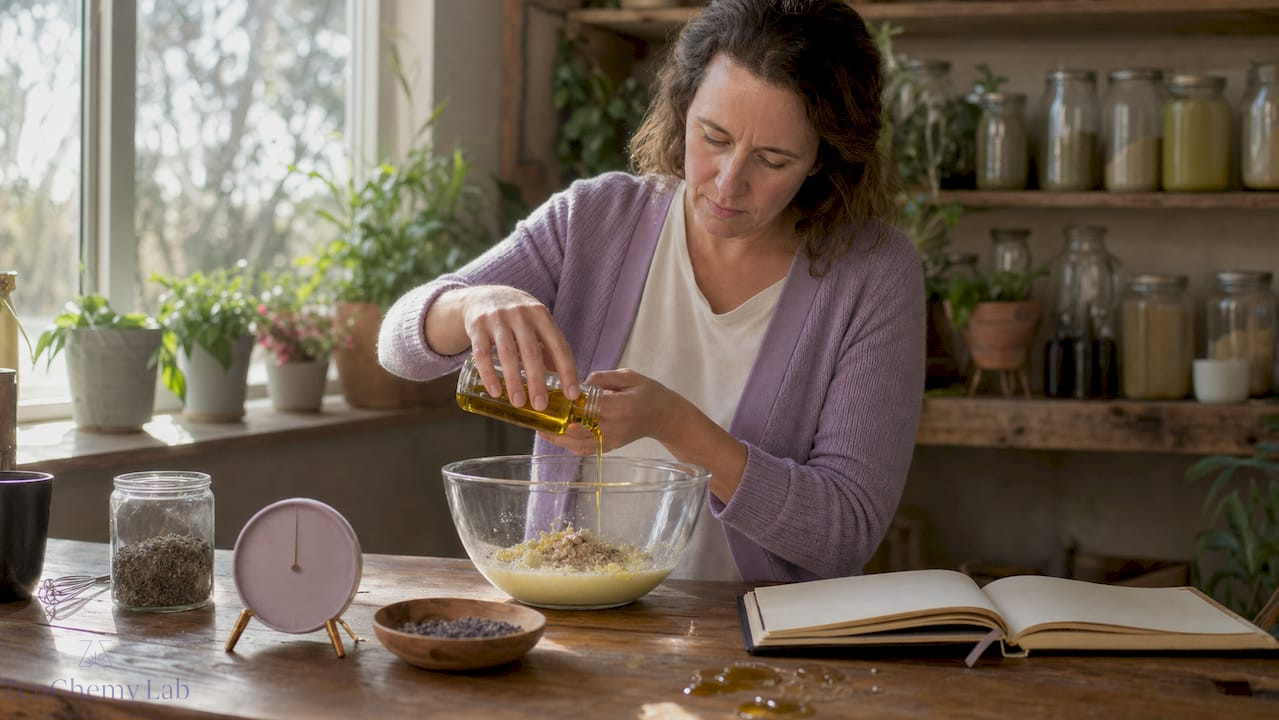
Making organic bath products is a craft that lets you transform certified natural ingredients into nourishing soaps, bath bombs, and oils tailored for your skin or as thoughtful gifts. The term “organic” in DIY skincare carries a precise legal meaning, not just a lifestyle preference. You need the right ingredients, safety tools, and formulation knowledge before your first batch. This guide covers everything from ingredient sourcing and cold-process soap making to bath bomb troubleshooting and labelling rules, so you can create with confidence from day one.
What makes an organic bath product truly organic?
Making organic bath products starts with understanding what “organic” actually means on a label. USDA NOP certification governs organic claims on finished products. You cannot use the USDA Organic seal on a bath product simply because you used organic coconut oil in the recipe. The finished product itself must be certified under the National Organic Program. That distinction matters enormously for anyone planning to sell or gift their creations.
Organic certification often conflates ingredient sourcing with finished product claims, which confuses many DIYers. Using certified organic ingredients is still worthwhile. It reduces your exposure to synthetic pesticides and solvents. You can note individual certified organic ingredients in your ingredient list, but you cannot feature the USDA seal on the front of your packaging without full product certification.
Common organic ingredients worth sourcing
The following ingredients are widely available in certified organic form and perform well in homemade skincare products:
- Carrier oils: Organic coconut oil, jojoba oil, sweet almond oil, and shea butter are reliable bases for soaps and bath oils.
- Essential oils for bath: Lavender, peppermint, eucalyptus, and tea tree are popular choices with well-documented skin benefits.
- Additives: Organic oat flour, kaolin clay, activated charcoal, and dried botanicals add texture and therapeutic value.
- Salts: Himalayan pink salt, Dead Sea salt, and organic sea salt work well in organic bath salt recipes.
Natural does not always mean safe. Organic status reflects sourcing and certification, not allergenicity or skin compatibility. Lavender essential oil, for example, can trigger contact dermatitis in sensitive individuals. Always patch-test new formulations before full use, and research each ingredient’s safe usage rate. Zenchemylab recommends checking resources like the natural ingredients list for spa-quality guidance on what to include.
Pro Tip: When reading ingredient labels from suppliers, look for the phrase “certified organic by [certifying body]” rather than just “natural” or “pure.” Those two words carry no legal weight.
How do you make cold-process organic soap safely?
Cold-process soap making is the most traditional form of natural soap making, and it produces a rich, glycerin-rich bar that commercial soaps rarely match. The chemistry behind it is called saponification: lye (sodium hydroxide) reacts with oils to produce soap and glycerin. You cannot make true cold-process soap without lye. There is no workaround.

Lye dissolves exothermically in water, meaning the solution heats rapidly and can splash if handled carelessly. Most accidents happen during rushed mixing, not from any unpredictability in the chemistry itself. Respect the process and the risks drop substantially.
Here is a step-by-step overview for a beginner batch:
- Gather your PPE. Wear nitrile gloves, safety goggles, and long sleeves before touching lye or raw soap batter.
- Measure everything by weight. Use a digital scale accurate to at least 1 gram. Volume measurements cause failed batches.
- Mix lye into water, never water into lye. Adding water to lye causes a violent reaction. Always pour lye slowly into the water while stirring.
- Melt and cool your oils. Heat solid oils like coconut oil and shea butter until liquid, then allow both the lye solution and oils to cool to approximately 40–50°C before combining.
- Blend to trace. Use a stick blender to emulsify the oils and lye solution until the batter thickens to a light pudding consistency.
- Add fragrance and botanicals. Stir in your essential oils and any organic additives at light trace to avoid acceleration.
- Pour into moulds. Silicone loaf moulds work well for beginners. Tap the mould gently to release air bubbles.
- Cure for 4–6 weeks. Curing soap allows excess water to evaporate and the pH to drop to a skin-safe level. Cutting too early produces a soft, caustic bar.
“Process discipline in cold-process soap making, including accurate measurement and full curing, matters more to safety and product quality than any marketing term on the label.”
Pro Tip: Run your recipe through a lye calculator like SoapCalc or Brambleberry’s online tool before every batch. Even small changes to your oil blend require a recalculated lye amount.
For a detailed visual walkthrough, Zenchemylab’s step-by-step soap guide covers mould selection and troubleshooting in depth.
How to create bath bombs and salts with organic ingredients
Bath bombs are one of the most rewarding DIY organic bath products to make. They require no heat and no caustic chemicals, making them accessible for beginners. The science is simple: baking soda (sodium bicarbonate) and citric acid react in water to produce carbon dioxide fizz. Getting the ratio and mixing technique right is what separates a firm, long-lasting bomb from a crumbly disappointment.
Dry ingredients must be mixed thoroughly before any liquid is added. Uneven dry mixing creates acid pockets that fizz prematurely when wet ingredients hit them. The standard dry blend includes baking soda, citric acid, Epsom salts, and cornstarch. A common starting ratio is 2 parts baking soda to 1 part citric acid by weight.
Bath bomb troubleshooting at a glance
| Problem | Likely Cause | Fix |
|---|---|---|
| Crumbling after pressing | Too dry or insufficient binder | Add a few extra drops of oil or witch hazel |
| Premature fizzing in the bowl | Wet ingredients added too fast | Slow down addition; mist rather than pour |
| Soft bombs that won’t hold shape | High humidity or too much liquid | Work in a dry room; reduce liquid binder |
| Bombs expand after moulding | Moisture in the air reactivating acids | Dry in a sealed container with silica gel |
- ✅ Add liquid ingredients (oils, polysorbate 80, colourants) one drop at a time while stirring constantly.
- ✅ Press firmly into moulds immediately after mixing reaches a damp-sand consistency.
- ✅ Allow bombs to dry for a minimum of 24–48 hours before unmoulding or packaging.
- ✅ Store finished bombs in airtight containers away from humidity.
Organic bath salt recipes are even simpler. Combine organic sea salt or Himalayan salt with a carrier oil, dried botanicals like lavender buds or rose petals, and a few drops of essential oil. A ratio of 3 parts salt to 1 part oil by weight gives a scoopable texture that dissolves well. Infused botanicals add visual appeal and make these salts excellent for gifting.
Pro Tip: For a luxurious bath salt blend inspired by Ayurvedic traditions, try adding organic coconut milk powder to your salt base. It softens water and leaves skin feeling silky. Products like the Coconut Milk Bath from Zenith show how effective this combination can be.
Crafting organic bath oils that actually bloom in water
A blooming bath oil disperses into a silky, milky cloud when poured into warm water rather than floating in an oily slick on the surface. Achieving this effect requires more than just pouring jojoba oil into a bottle. The formulation must balance carrier oils, a solubiliser or emulsifier, and stabilising additives.
Typical blooming bath oil batches are formulated around 250 g and include ingredients like vitamin E for oxidative stability and 0.5 g of gromwell extract for a milky dispersion effect. Here is a simple process to follow:
- Weigh your carrier oils. Organic sunflower, sweet almond, or jojoba oil make excellent bases. Aim for approximately 200 g of carrier oil per 250 g batch.
- Add your solubiliser. Polysorbate 20 or a natural alternative like PEG-free Plantacare helps the oil disperse rather than float.
- Incorporate vitamin E. Add 1% vitamin E (tocopherol) by weight to extend shelf life and support skin nourishment.
- Add gromwell extract. At 0.5 g per 250 g batch, this botanical extract contributes the characteristic milky bloom effect.
- Blend in essential oils. Add your chosen essential oils for bath at a safe usage rate, typically 1–3% of total batch weight.
- Bottle and label. Use dark glass bottles to protect against UV degradation. Label with the date and ingredient list.
Proper dispersion in blooming bath oils relies on the right balance of emulsifiers and additives to maintain suspension in bathwater. Without that balance, you get greasy patches rather than a silky soak. If your oil is separating or leaving residue, increase your solubiliser slightly and re-test.
Pro Tip: Always add your bath oil to running water rather than a still bath. The agitation helps the emulsifier do its job and distributes the oil evenly throughout the tub.
Labelling and regulatory rules for homemade bath products
Labelling is where many enthusiastic DIYers make costly mistakes. The rules differ significantly depending on whether you are making products for personal use, gifting, or selling.
For personal use, labelling requirements are minimal. For anything distributed beyond your own home, Canadian and U.S. regulations apply. Selling or distributing bath products beyond personal use requires compliance with FDA cosmetic regulations, including ingredient declarations using INCI (International Nomenclature of Cosmetic Ingredients) names listed in descending order of concentration under 21 CFR Part 701. Canada’s Cosmetic Regulations under the Food and Drugs Act carry similar requirements.
Key labelling rules to follow when sharing or selling:
- Ingredient list: Use INCI names in descending order by weight. “Cocos nucifera oil” not “coconut oil.”
- Organic claims: Do not use the USDA Organic seal or the word “organic” on the principal display unless your finished product holds NOP certification.
- ⚠️ Claim restrictions: Terms like “hypoallergenic” and “cruelty-free” are not regulated in Canada but can still mislead consumers if used carelessly. Zenchemylab’s guide on what organic body care means explains these distinctions clearly.
- Packaging: Include your name and address, net quantity, and any relevant warnings (e.g., “avoid contact with eyes”).
- ✅ Gifting vs. selling: Gifting homemade products carries lower regulatory risk, but you still bear moral responsibility for safety and accurate ingredient disclosure.
Understanding these rules protects both you and the people who use your products. Transparency builds trust, and trust is the foundation of any meaningful skincare practice.
Key takeaways
Making organic bath products safely and effectively requires certified ingredient sourcing, precise formulation, strict safety protocols, and honest labelling from the very first batch.
| Point | Details |
|---|---|
| Organic means certified | Only NOP-certified finished products can legally carry the USDA Organic seal. |
| Lye safety is non-negotiable | Always add lye to water, wear PPE, and cure cold-process soap for 4–6 weeks. |
| Dry mixing prevents failed bombs | Thorough dry blending before adding any liquid stops premature fizzing in bath bombs. |
| Blooming oils need emulsifiers | Solubilisers like Polysorbate 20 prevent greasy residue and create a silky soak. |
| Labelling rules apply beyond personal use | INCI ingredient declarations are required when distributing or selling any cosmetic product. |
Why patience is the most underrated ingredient
I have made a lot of batches over the years, and the single biggest mistake I see from enthusiastic beginners is rushing. Someone spends an afternoon making a beautiful cold-process soap, cuts it after three days because it looks solid, and then wonders why it burns their skin. The saponification process is still completing. The pH is still dropping. The soap is not ready.
The same impatience shows up in bath bomb making. People add their carrier oil too quickly, the mixture starts fizzing in the bowl, and they panic and press it into moulds anyway. The result is a bomb that crumbles or expands overnight.
What I have found is that the most successful DIY skincare makers treat their craft like baking bread. You follow the formula, you respect the timing, and you do not open the oven early. Organic ingredients are genuinely beautiful to work with. Lavender and goat’s milk combinations, like those found in products such as Lavender and Goat’s Milk Soap from Zenith, show what thoughtful formulation can produce. But no ingredient, however premium, compensates for skipped steps.
My other strong opinion: be honest on your labels. If your product uses organic coconut oil but is not certified organic as a finished product, say “made with organic coconut oil.” That phrasing is accurate, credible, and builds real consumer trust. Overclaiming is the fastest way to lose the confidence of the people you are making these products for.
— Alex
Explore zenchemylab’s natural skincare collection
If you are building your DIY practice and want inspiration from expertly formulated natural products, Zenchemylab is a great place to start. The collection spans artisanal soaps, botanical cosmetics, and body care items made from raw, natural ingredients with a focus on purity and skin health.
Browse the natural skin collection to see how professional formulations balance organic ingredients for real results. You will also find helpful reads on building a natural body care routine and top botanical cosmetics worth adding to your self-care practice. Whether you are crafting your own products or looking for ready-made options, Zenchemylab offers the knowledge and the goods to support your natural wellness goals.
FAQ
What does “organic” mean in DIY bath products?
Organic refers to certified ingredient sourcing under programmes like the USDA National Organic Program. Using organic ingredients does not make your finished product legally “organic” unless the product itself holds NOP certification.
Is lye safe to use at home for natural soap making?
Lye is safe when handled correctly. Wear gloves and goggles, always add lye to water (never the reverse), and work in a well-ventilated space to avoid fumes.
How long do homemade cold-process soaps need to cure?
Cold-process soaps require a curing period of 4–6 weeks to allow water to evaporate and the pH to reach a skin-safe level. Cutting this time short produces a caustic, soft bar.
Why do my bath bombs crumble or fizz prematurely?
Premature fizzing is caused by adding wet ingredients too quickly or by uneven dry mixing. Crumbling usually means the mixture is too dry or lacks a sufficient binder like a carrier oil.
Can i sell homemade bath products without special certification?
You can sell homemade cosmetics, but you must comply with FDA and Canadian Cosmetic Regulations, including INCI ingredient declarations and accurate label claims. Avoid using “organic” on packaging unless your finished product is NOP certified.

2 Comments